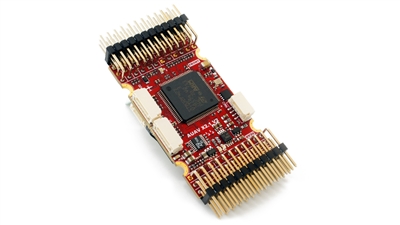
mRo-X2.1 Autopilot
The mRo-X2.1 autopilot is based on the Pixhawk®-project FMUv2 open hardware design. It runs PX4 on the NuttX OS.

This flight controller is manufacturer supported.
总览
- Main System-on-Chip: STM32F427
- CPU: STM32F427VIT6 ARM® microcontroller - Revision 3
- IO: STM32F100C8T6 ARM® microcontroller
- 传感器:
- Invensense® MPU9250 9DOF
- Invensense ICM-20602 6DOF
- MEAS MS5611 barometer
- Dimensions/Weight
- Size: 36mm x 50mm (Can be ordered with vertical, horizontal or no headers installed)
- Mounting Points: 30.5mm x 30.5mm 3.2mm diameter
- 重量: 10.9g
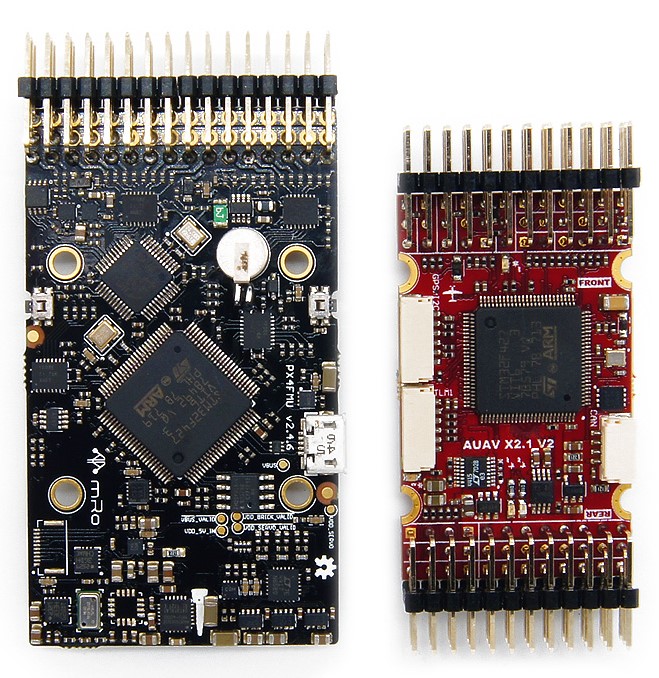
The diagram below provides a side-by-side comparison with a Pixhawk 1. The mRo features almost identical hardware and connectivity but has a much smaller footprint. Major differences are updated sensors and Rev 3 FMU.

Connectivity
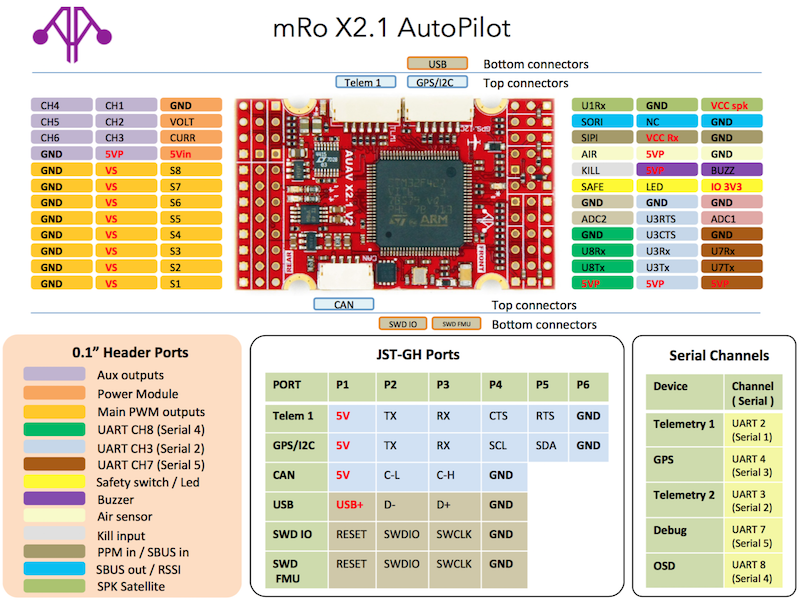
- 2.54mm headers:
- GPS (UART4) with I2C
- CAN Bus
- RC input
- PPM input
- Spektrum input
- RSSI input
- sBus input
- sBus output
- Power input
- Buzzer output
- LED output
- 8 x Servo outputs
- 6 x Aux outputs
- Offboard microUSB connector
- Kill Pin output (Currently not supported by firmware)
- AirSpeed Sensor
- USART2 (Telem 1)
- USART3 (Telem 2)
- UART7 (Console)
- UART8 (OSD)
PX4 BootLoader Issue
By default a mRo X2.1 might come preconfigured for ArduPilot® rather than PX4. This can be seen during firmware update when the board is recognized as FMUv2 instead of X2.1.
In this case you must update the BootLoader using BL_Update_X21.zip. If this correction is not carried out your compass direction will be wrong and the secondary IMU will not be detected.
The update steps are:
- Download and extract BL_Update_X21.zip.
- Find the folder BL_Update_X21. This contains a bin file and a subfolder named /etc containing an rc.txt file
- Copy these files to your micro SD card's root directory and insert it into the mRO x2.1
- Power on the mRO x2.1 Wait for it to boot and then reboot 1 time.
访问链接
This product can be ordered at the mRobotics® Store.
Wiring Guide

编译固件
Most users will not need to build this firmware! It is pre-built and automatically installed by QGroundControl when appropriate hardware is connected.
To build PX4 for this target:
make mro_x21_default
Schematics
The board is documented on the mRo hardware repo: x21_V2_schematic.pdf.
Serial Port Mapping
| UART | Device | Port |
|---|---|---|
| USART1 | /dev/ttyS0 | IO debug |
| USART2 | /dev/ttyS1 | SERIAL1 |
| USART3 | /dev/ttyS2 | TELEM2 |
| UART4 | /dev/ttyS3 | GPS/I2C |
| USART6 | /dev/ttyS4 | PX4IO |
| UART7 | /dev/ttyS5 | SERIAL5 CONSOLE |
| UART8 | /dev/ttyS6 | SERIAL4 |

